Emulate Sega Game Gear Classics on Steam Deck
Unleash Your Inner Gamer: Playing Game Gear Classics on Your Steam Deck
The Sega Game Gear, a 90s handheld marvel, now finds a new home on the Steam Deck thanks to EmuDeck. This guide walks you through installing EmuDeck, transferring your ROMs, and optimizing performance for a flawless retro gaming experience. We'll also cover Decky Loader and Power Tools for enhanced control.
Before You Begin: Essential Preparations
 Before diving into retro gaming, ensure you've taken these steps:
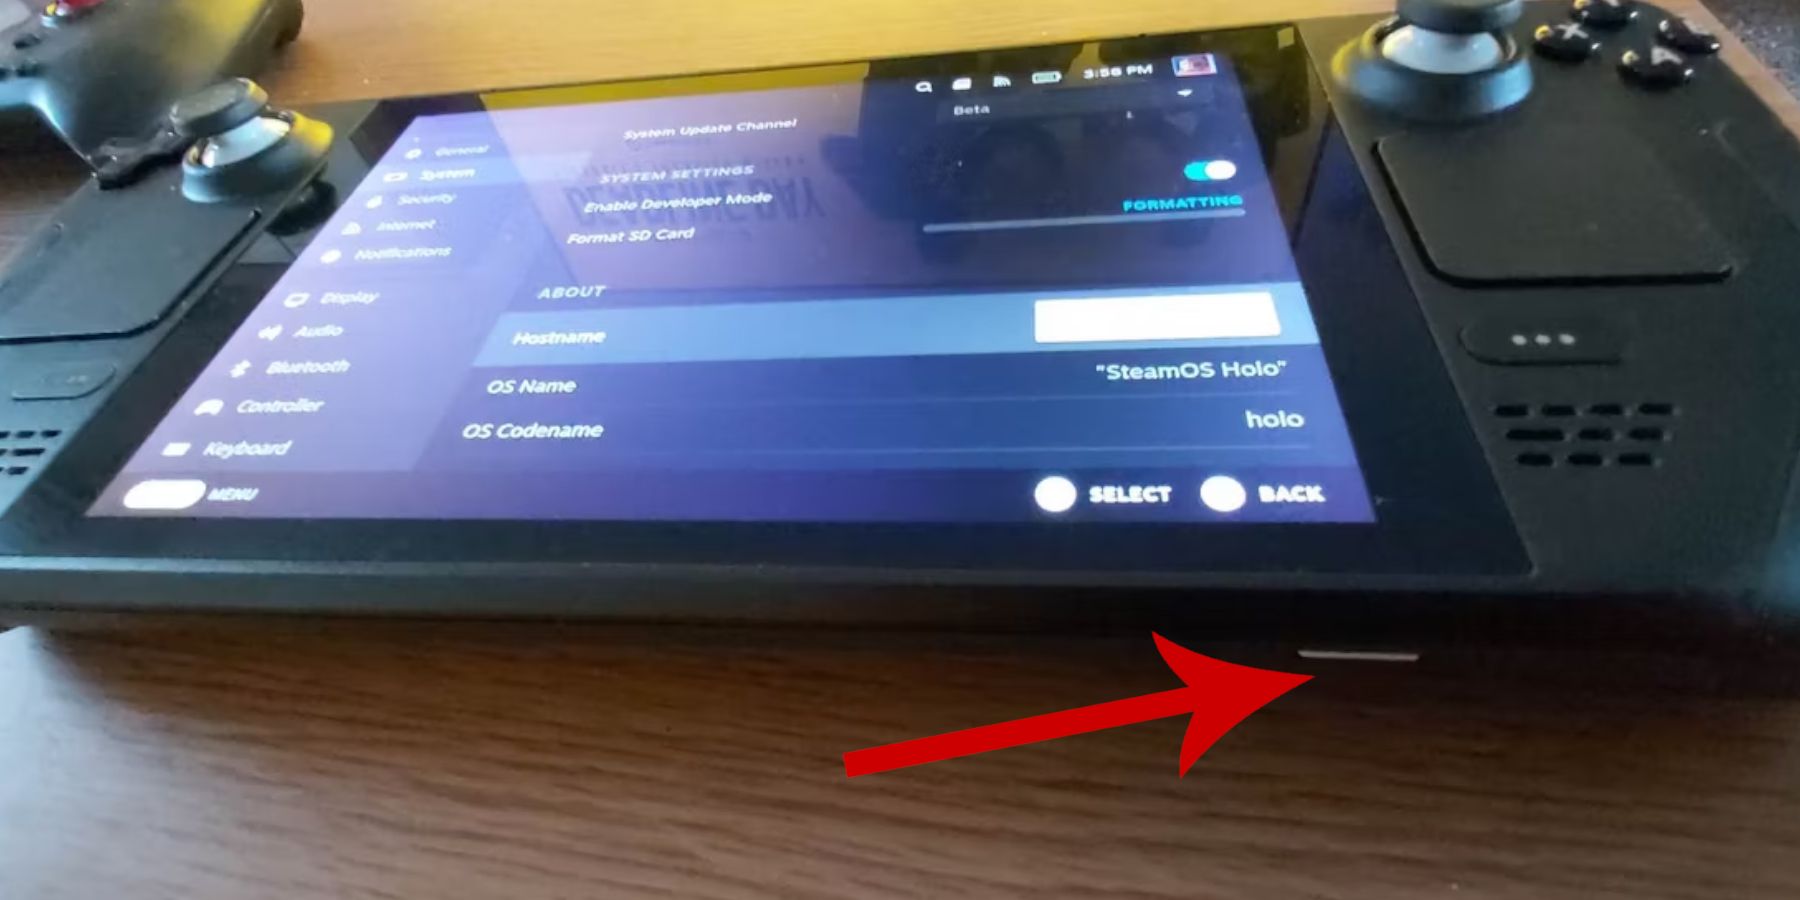
- Enable Developer Mode: Navigate to Steam > System > System Settings > Enable Developer Mode. Then, in the Developer menu, enable CEF Remote Debugging. Restart your Steam Deck.
- Essential Gear: An A2 microSD card (or external HDD connected via dock) is crucial for storing ROMs and emulators, keeping your internal SSD free for Steam games. A keyboard and mouse significantly simplify file transfers and artwork management. Remember to legally obtain your Game Gear ROMs.
Installing EmuDeck on Your Steam Deck
 Let's get EmuDeck up and running:
- Switch to Desktop Mode (Steam button > Power > Switch to Desktop).
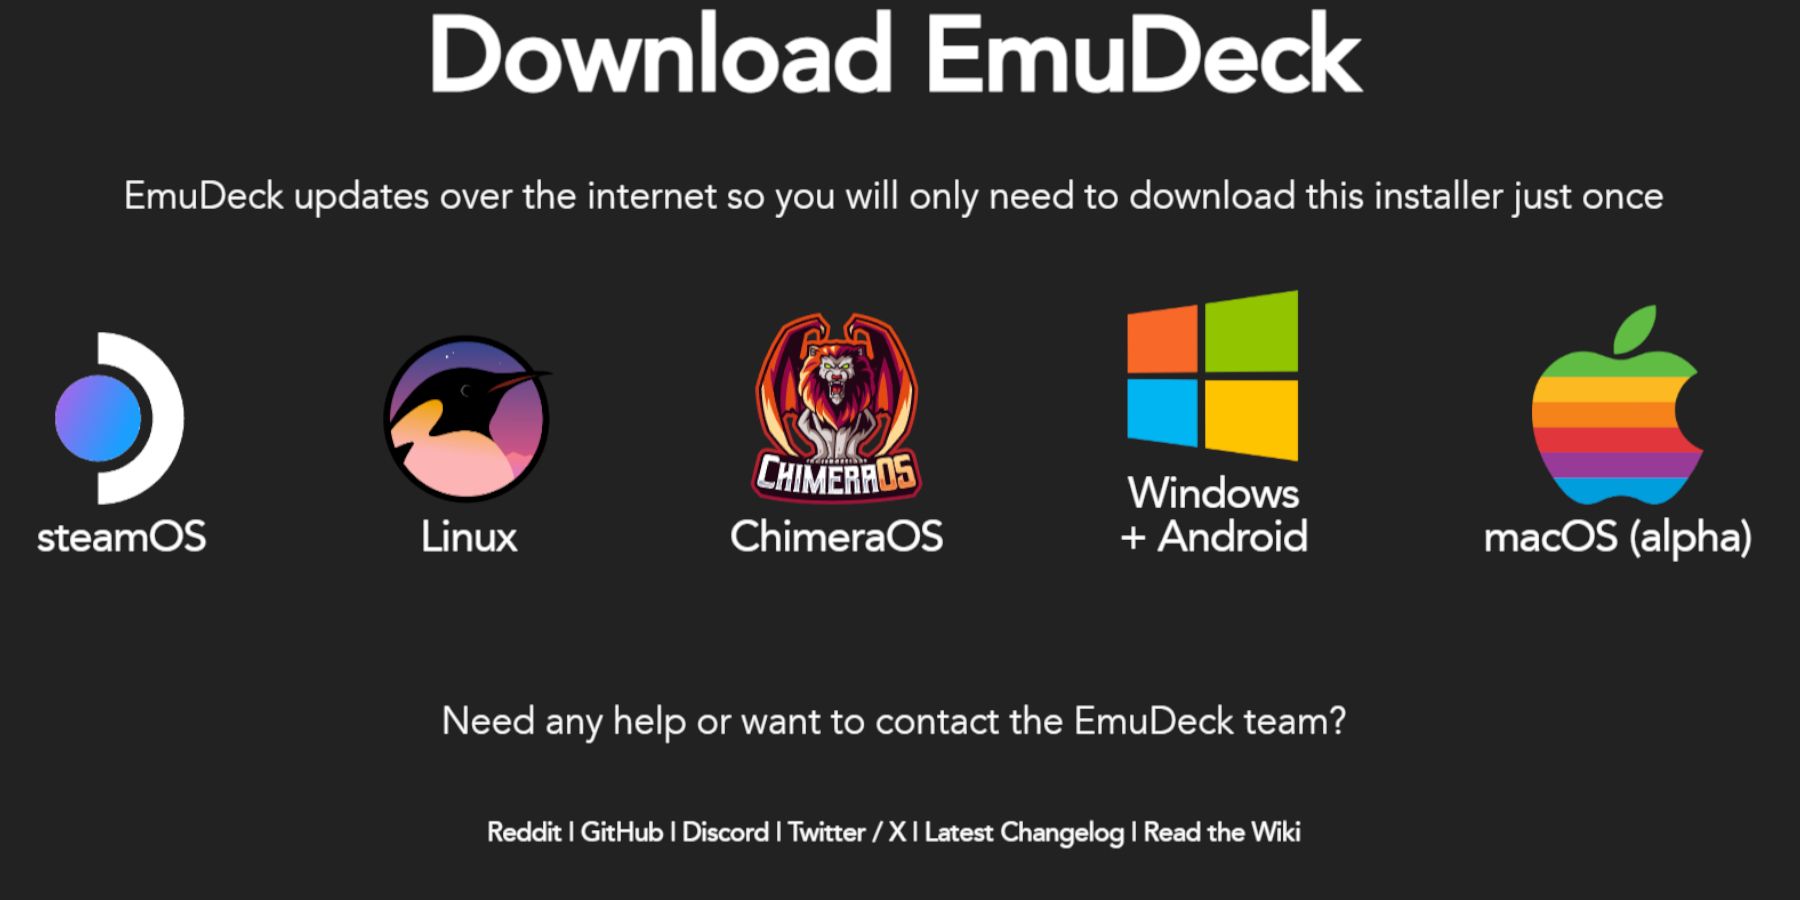
- Open your preferred browser and download EmuDeck from its official website.
- Choose the SteamOS version and "Custom Install." Select your SD card as the primary installation location.
- Select your desired emulators (RetroArch, Emulation Station, Steam ROM Manager are recommended). Enable "Auto Save."
- Complete the installation.
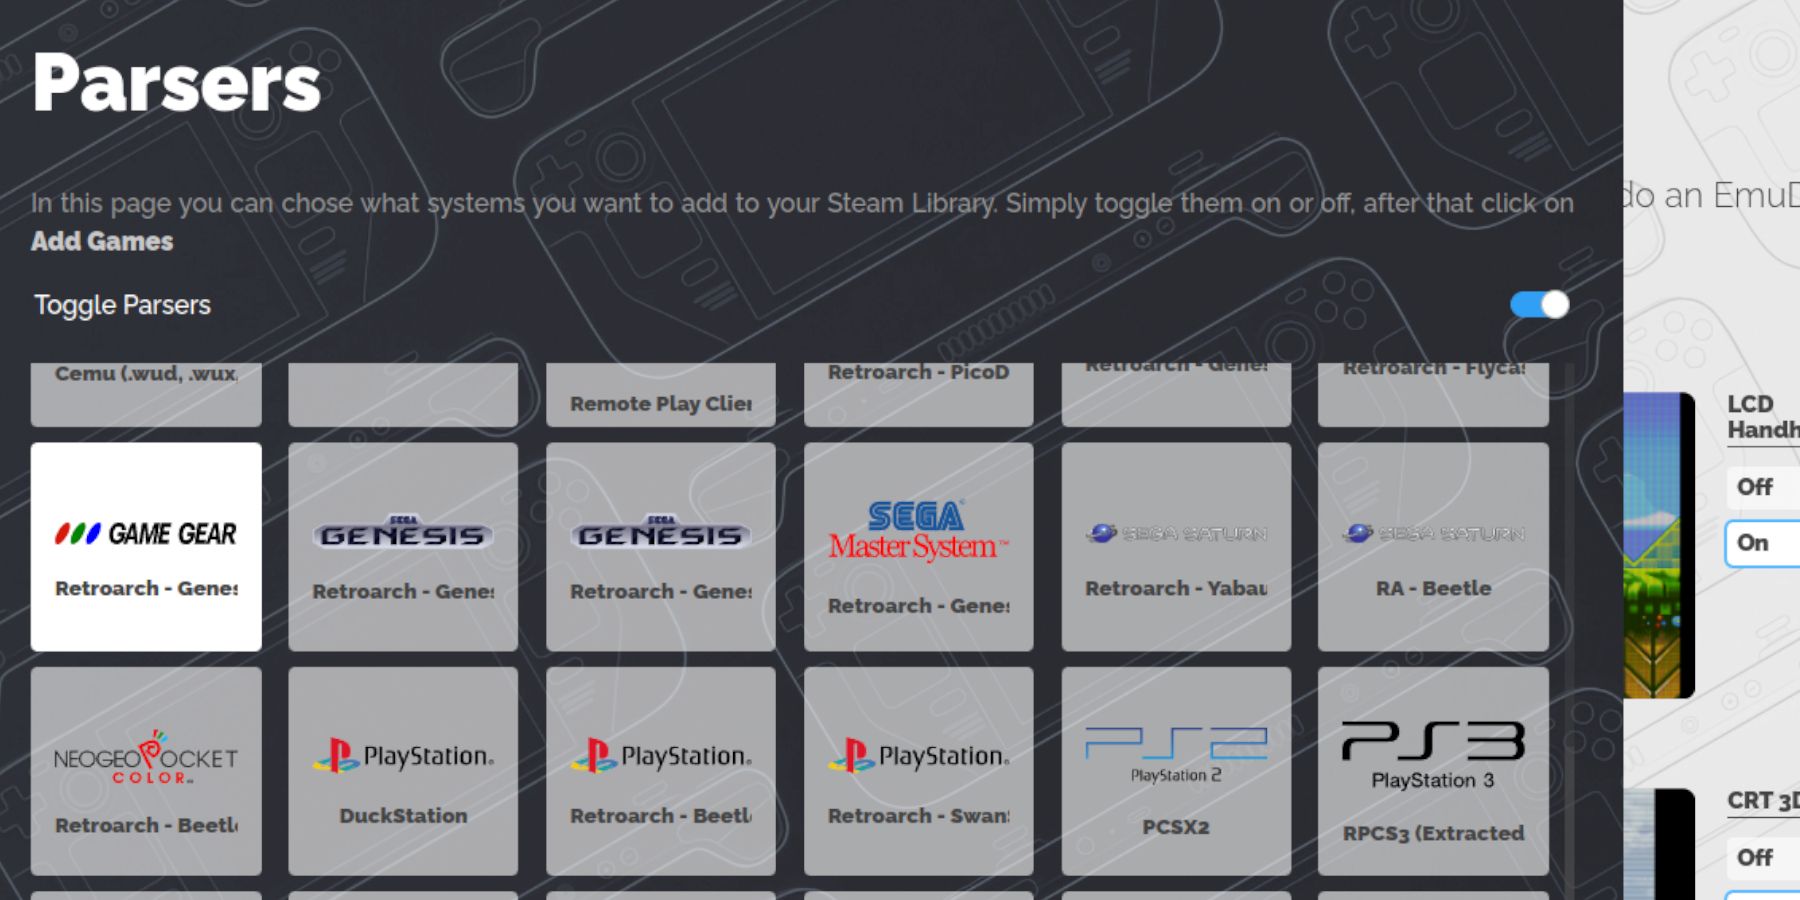
Quick EmuDeck Settings:
Within EmuDeck, access Quick Settings and ensure:
- AutoSave is enabled.
- Controller Layout Match is enabled.
- Sega Classic AR is set to 4:3.
- LCD Handhelds is On.
Transferring Your Game Gear ROMs and Using Steam ROM Manager
 Time to add your games:
- In Desktop Mode, use Dolphin File Manager to navigate to
Primary > Emulation > ROMs > gamegear. - Transfer your Game Gear ROMs into this folder.
- Open EmuDeck and launch Steam ROM Manager. Follow the on-screen prompts, selecting the Game Gear icon as your parser. Add and parse your games, ensuring artwork is correctly assigned, then save to Steam.
Troubleshooting Missing Artwork
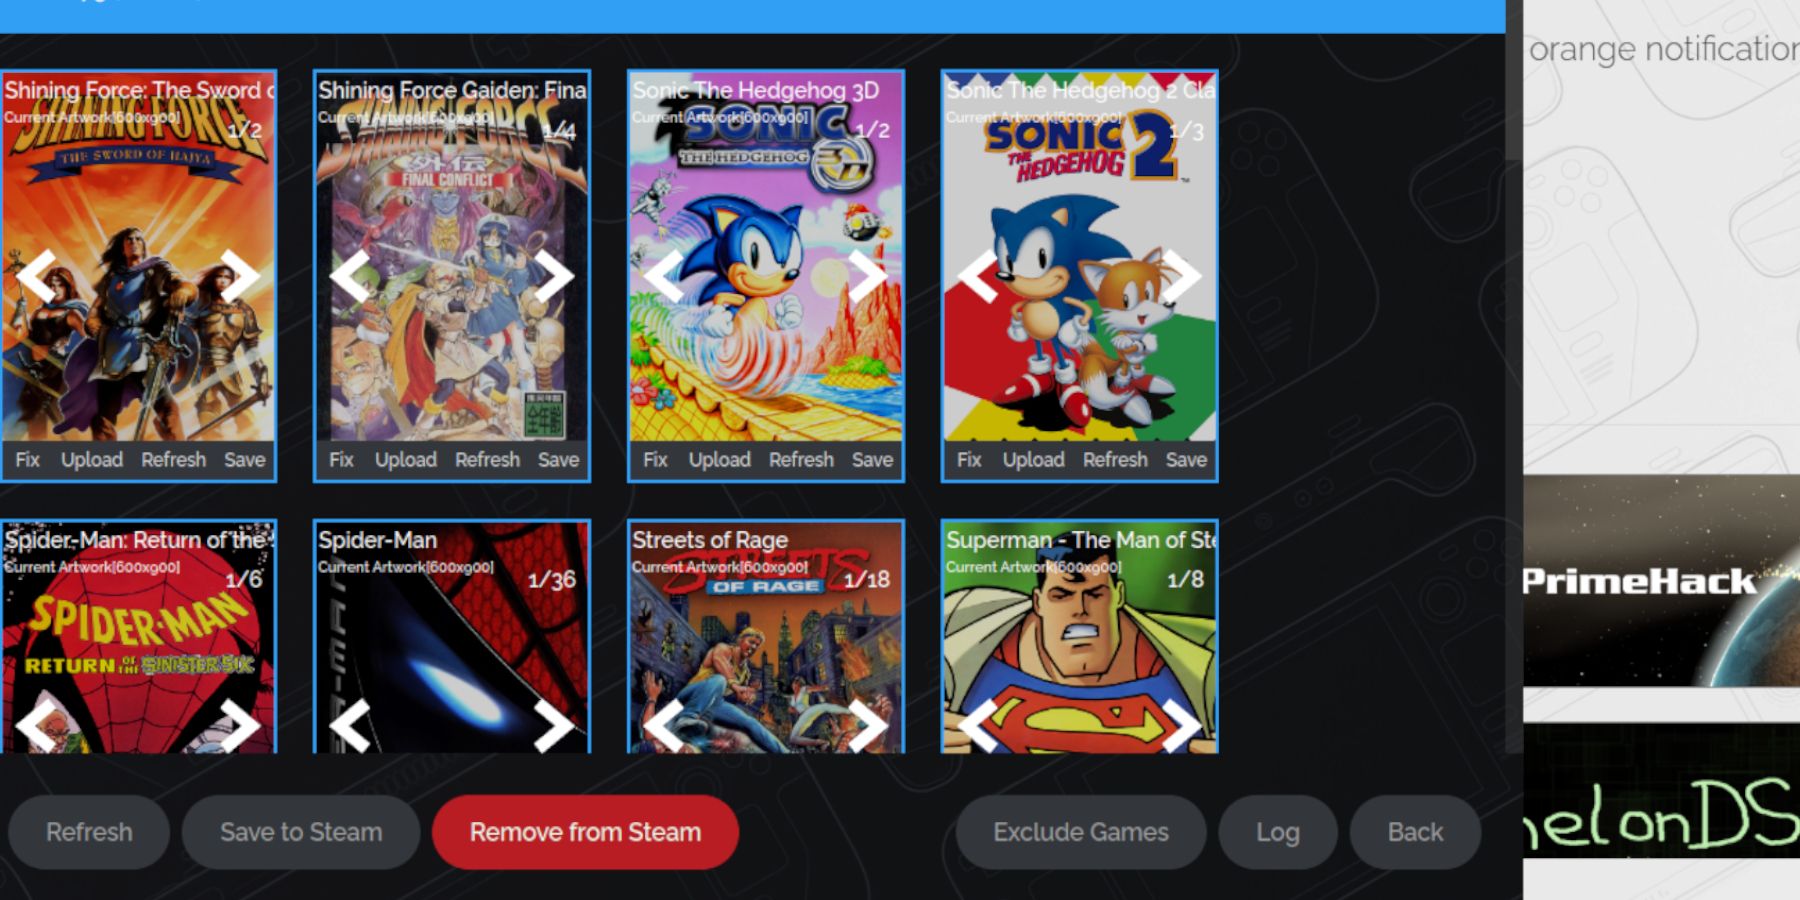 If artwork is missing or incorrect:
- Use Steam ROM Manager's "Fix" function to search for and apply correct artwork.
- Ensure ROM filenames don't contain numbers before the game title, as this can interfere with artwork detection.
- Manually upload missing artwork via Desktop Mode, placing the image in the Steam Deck's Pictures folder, then using Steam ROM Manager's "Upload" function.
Playing Your Games and Optimizing Performance
- Return to Gaming Mode. Access your Game Gear games through the Steam Library's Collections tab.
- Performance Tweaks: Game Gear games often default to a sluggish 30 FPS. To fix this:
- Access the Quick Access Menu (QAM), select Performance, enable "Use per-game profile," and set the Frame Limit to 60 FPS.
Unlocking Advanced Performance with Decky Loader and Power Tools
 For ultimate control:
- Install Decky Loader (Desktop Mode, download from GitHub, select Recommended Install, restart).
- Install the Power Tools plugin via the Decky Loader store.
- Within Power Tools, disable SMTs, set Threads to 4, enable Manual GPU Clock Control, increase GPU Clock Frequency to 1200, and enable Per Game Profile.
Recovering Decky Loader After a Steam Deck Update
 If a Steam Deck update removes Decky Loader:
- Switch to Desktop Mode.
- Re-download Decky Loader from GitHub. Select "Execute" (not "Open") to avoid resetting your settings. Enter your sudo password.
- Restart your Steam Deck.
Now, enjoy your Game Gear classics on your Steam Deck with enhanced performance and control!


- 1 Zenless Zone Zero [ZZZ] Codes (December 2024) – 1.4 Livestream Codes Feb 08,2025
- 2 Capcom Spotlight February 2025 and Monster Hunter Wilds Showcase: Everything Announced Mar 05,2025
- 3 New LEGO Sets for March 2025: Bluey, Harry Potter, and More Mar 06,2025
- 4 Gothic 1 Remake Demo: Frame-by-Frame Comparison with Original May 01,2025
- 5 PUBG Mobile Redeem Codes for January 2025 Live Now Feb 13,2025
- 6 "Assassin's Creed Shadows Unveils Canon Mode" Apr 26,2025
- 7 Pokémon TCG Pocket Unveils Premium Pass and Trade Tokens Apr 21,2025
- 8 Roblox's RNG War TD Codes Unleashed (2025 Update) Feb 12,2025


![Business of Loving [v0.12.5i] [Dead End Draws]](https://imgs.96xs.com/uploads/18/1719555107667e5423ef803.jpg)

-
Top Business Management Apps for Android
A total of 10
-
Best Racing Games to Play Now
A total of 10
-
Best Competitive Multiplayer Games on Android
A total of 10